About Me

My photo
Hi, My name is Kate and this blog is all about my adventures of happy living. By that I mean crochet, chickens and cooking. Here's to the good life - and being a good wife! xxx
Showing posts with label Christmas. Show all posts

Saturday, 29 December 2012

Scrappy Christmas Bunting and Scented Christmas Tree Decorations using scraps from the scraps)

I had almost forgot to post about my thrifty delight that is "scrappy Christmas bunting".

I was the most perfect-simple-oh-so-satisfying couple of hours I spent on the morning of Christmas Eve.

I had a fair bit of joined up jelly roll strips from the Christmas Table Runner (if you haven't yet seen it .... follow this link ... I hope you like it! I am uber proud!) so carefully snipped out some triangles and then some plain fabric in festive green.


I then whipped up 10 flags and then raided my "pretty little things" (whilst humming this tune) and added some cute little bells and charms that fell out of the most beautiful little Paperchase crackers I purchased in last years January Sales .... I knew they would come in use!


These little pretty things were tooooooo pretty to just tie on with any normal thread! I used my precious vintage roll of gold thread that I received from the lovely mum in a parcel she sent me during the Bloggy Blanket Chain (if you go and check out this post I did about it then you can follow the link to Mum's page .... she is so brilliant and does do a great job of looking after all of us bloggers!).

Anyways ..... what more fun could I be having ..... creating-Christmas-crafts!!!!


After using some lovely left over spotty red bias binding to join all the flags up I decided the wall in our kitchen could do with a little bit of jollying up .... so two tacks later (and a little help from Craig) our kitchen wall looked like it was celebrating Christmas too!


Ta-Dah!!!!!

And if that wasn't enough fun for the morning!!! ..... There were scraps left from the scraps!!!

So I made lots of little triangles and made some Christmas Tree Scented Tree Decorations!

Oh so easy, oh so smelly, oh so lovely!

Firstly I got a bowl and put in Christmas smelling stuff ..... Cinnamon sticks, orange peels, mixed spice, cloves ..... etc .... your all Christmas loving peeps ..... you know the whiffs!


I mixed it together and took a sniff .... but being careful not to sniff too hard .... I didn't want to Christmas over-dose!

I then filled my little tree's with toy stuffing and and teaspoon of the smelly-stuff and then joined up the gap with a tree trunk!


These were used to wrap up little gift bags of homemade fudge to give to my guests coming in the afternoon for coffee and mince pies .... and they went down a treat!


So that was my little morning of sewing ..... ahhhhh .... it seems like so long ago ... I wish it was Christmas Eve again, everything is over so quickly when you grow up .... I guess it won't seem like a minute until the next one arrives though!

Thanks for stopping by.

Love xxxxxxxxxxx

**********************************************************************************
A Tutorial on how to make bunting.

Cut long strips from various fabrics. Either all the same width (including your seam allowance) or at variant angles and widths (this is easier when your a beginner).

Join the strips by placing two pieces the right side together and sewing a hem along the long edge. Keep adding a strip until you have the correct width. Then press the seams.

Next use a template and cut out all of your flags (plus one triangle for the back - I used plain green fabric) from the new piece of stripey fabric you have just made.

Then, place your front piece and back pieces together, the right sides facing in. Go around each of the triangles on your sewing machine, leaving the straight, top edge free.

Turn all of your flags out the right way and iron them. I then trimmed the top edge as this was a little wonky now.

Arrange onto your bias binding (there are some great videos on you tube if you want to know how to use it) and then zoom up the row of flags with your sewing machine.

I then added some little trinkets on the bottom. You can add buttons on the binding in between the flags as this looks nice too.

If you want to see a crochet bunting tutorial then check out this link to one of my previous posts where I made some Happy Birthday Flags!

**********************************************************************************

Wednesday, 26 December 2012

Snowflake Swap Goddies!

I feel so elated to finally be able to tell you what I got in my snowflake swap with Helen from Moonstruck Creations.

When I received my swap a couple of weeks ago I put all the gifts under the tree and on Christmas eve transferred them into my stocking. It killed me not being able to open them!!! They were wrapped in the most adorable paper and there were so many exciting shapes to think about!!


The first thing I did very early on Christmas morning was to tip out my stocking onto the bed and get to opening up those goodies.

I had so delightfullllllllllllll snowflake window stickers which I loved! Plus a little light up snowflake .... which reminds me. I must put that in the window tonight!


A 2013 diary to keep me organised, some Christmas tissues, a cute compact mirror and lip gloss in the shape of a cupcake.


I also got a Yankee candle in my ultimate favourite Christmas scent!!! Again today I will burn it to carry on all the Christmas jolliness! Also I got the first chocolate item of the day. A little chocolate teddy bear.

So ....... for the final reveal....... the crocheted snowflakes!!!! ...........


Aren't they just lovely. I am so pleased with them. They have lived for a few hours on my welsh dresser, and are now hanging from the tree!

I love them, thank you Helen!

xxxxx


I do hope you all had a lovely Christmas day. I was sooo lucky and got spoilt rotten by my family, friends and husband. Too much stuff to even start..... from recipe and crafting books, knitted slippers and scarfs from my crafting friends, diamonds (oh yes Craig knows how to spoil me), fabrics and kitchen things ........ anyway .... I wish you a Merry Christmas and hope that you have a lovely day today and a great festive week.

Love xxxxxxxxxxxxxxxxxxxxxxxxxxxxxxxxx

Friday, 21 December 2012

Kate's Christmassy-Boozy-Ginger-Truffles


Heat 300g of milk chocolate, a big glug of advocaat, a small pot of double cream and two teaspoons of ground ginger in a pan. Stir all the time and don't let boil.

Pour into a container and let it set in a cool place.
Once set use a teaspoon to scoop out a ball of the mixture and roll quickly in the palm of your hand.

Then roll again onto a plate with your desired covering.
I have used sugar crystals, coca powder and white chocolate shavings.

Will keep in the fridge for a few days. Perfect to make in advance of a Christmas party!

Christmas Tree Table Runner - TA - DAH!!!!!


Over the past few weeks I have been working on a Christmas Quilted Table Runner. Since I have started learning how to sew it has always been my aim to learn how to quilt. I saw the workshop advertised on the lovely Lichfield Sewing Shop facebook page and signed up there and then.

After going to the stocking workshop and enjoying it so much, and even coming home feeling inspired to go on and produce more and more stockings I was confident that this was the start of a beautiful quilting relationship.

So to start .... we joined 6 strips of delicious red fabric together and then six green strips of fabric.

This was my favourite bit!!!! I loved the easiness (remember I am a beginner!!!) of zooming up and connecting AmAzInGlY gOrGeOuS strip of fabric to another AmAzInGlY gOrGeOuS strip of fabric.
 
I spent that particular half an hour in sewing shop paradise! I mean who can blame me .....

Once I had pressed the seams I cut out lots of Christmas tree triangles out of my new stripy pieces of fabrics.
 
Then it was onto the slightly harder stage two where I cut out all of the white fabric joining bits. Followed by the even harder, and must concentrate, part of joining my Christmas trees with the white fabric bits.
 
And then some more pressing. Does anyone else love the smell of iron and fabric? No, just me then??
 
This took me to the end of the day and I scheduled in to come back and finish it off once I had broken up for work. Plenty of time to admire those lovely pieces of fabric and soak up all the different things I had learnt.
On Monday I returned feeling confident I would be able to complete at home (guided by the wonderfully provided instructions of course!). All I needed was to go back to the shop for a touch of the magic rotary cutter to straighten up my edges and a little fill of Sewing Shop lurveee .... a debate of Lucy's Festive Crocheted Wreath and a comparison of husband present buying mishaps.
At home, I had got the bug big time. Monday night was spent adding the trunk details and final white border.
 
And then it was onto the bit I had been waiting for....... QUILTING!!!!
My kitchen floor became my workbench and the rest of the room was transformed into hazardous amalgamation of flying pins and steaming irons as I joined the wadding and backing fabric onto my lovely Christmas tree scene!
 
Then was the fun bit ..... sewing it all together! After much debate with my better half we decided on vertical lines all over.
 
A couple of hours later, two broken needles and a few horizontal additional lines later I was the owner of a ooooo soooooo lovely (unbinded) quilt. I felt like squealing with excitement, and my husband was pretty chuffed too!
I rewarded myself with a little snowball and a nice early night!
The next morning I was all charged up ready to bind the quilt with my red spotty bias binding. I didn't want to make the usual mistake of just s"eeing what would happen without thinking about it first" ..... so I did a bit of research on youtube. I found this fantastic video which I had on pause as I went round corner by corner.
After loosing two needles to the thickness of the quilt, I made the correct decision to add a thicker needle - and it paid off ... the mitered corners were pretty hefty!
 
So, I conclude, after a journey of blood (nasty pins), sweat and tears, sheer pride and gleeful joy!
Drum roll please ....... drdrdrdrdrdrdrdrdrdrdrdr........
 
TA-DAH!!!!!!!!!!!!!!!!!!!!!!!!!!!!!!!!!!!!!!!!!!!!!!!!!!!!!!!!!!!!!!!!!!!!
 
My proudest blogging ta-dah to date.
A scrummy quilted table runner. Not bad for a first go, huh?
Don't you just love the fabrics??? I think my favourites are the nordic red and white strip, the spotty green one and the holly piece. Luscious!
 
One last look and then I will have to go ...
 
Ahhhh, a lovely satisfied foot photo! I will now find a lovely place to put it. Hearth? Coffee Table? or Dining Table? I am sure it will travel with me to a fair few places over the next week or two.
Thanks for reading, and all of your continued lovely comments and I'll speak soon xxxxxx
Kate xx


Tuesday, 18 December 2012

Driftwood Christmas Tree


So while I was busy decorating the living room, Craig set off to do the conservatory.

He went wild with filling vases with bauballs. Snowflaking the windows. Making the ledges look pretty. Dressing out second tree.

And last but not least dressing the driftwood.

Doesn't it look lovely. Not what I had in mind, but just lovely because he was so proud of it!

xxxxxxxxx

Saturday, 15 December 2012

Holidays are a-coming!


Wahoooooooo I have officially broken up for Christmas. 19 days in total. I couldn't be more happy!

I had some holiday going spare so decided there couldn't be a nicer time to use it.

Last night I celebrated with a lovely glass (Craig's Granddad's old Polish glasses ... we have the whole set!) of Madeira wine. Mmmmmm it just chillaxed the blood ready for a much earned break! I snuggled up with my hubby and watched National Lampoon's Christmas Vacation. Such a funny film!


Last week helped on the Round Table Santa Sleigh, collecting money with charity. We knocked on ever door to tell the children (and grown ups) that Santa was coming. All the houses then rushed around getting on shoes and coats to then wait on the street listening to Santa's sleigh on its way, blasting out favourite Christmas songs. They then wave to him as he passes.


This is something that I loved when I was little, and I totally loved actually helping. It was so enjoyable and I had that many Merry Christmas Wishes I didn't know what to do with them! I simply Christmased Out with happiness! It was so exciting to watch children literally shake with glee as he passed and watch adult turn into kids for a few seconds (seriously some adults, me included, can be so drawn into these things, we turn into five year olds again).


I have been lucky enough to have 2 Christmas party's this week and all that hard work of homemade gifts has certainly paid off. I loved giving away my wrapped pressies to my bestest friends at work and Knitting Class. I also was the lucky receiver of some beautifully wrapped presents that are now taunting me from under the tree .... oh well, only 10 days to wait .... I can do it!

I also received my snowflake swap from the lovely Helen at Moonstruck Creations. I couldn't believe it when I tipped them package over the sofa and all of this fell out ...........


Yipeeee ..... another thing I am going to have to wait 10 days for! I can't wait to show you what I got!

Although I wait in anticipation for the 25th of Dec, I have been sooooo lucky already. I mean just look at this beautiful card from my friend Lisa at work....


And this gorgeous hand made card from my lovely friend Jill who goes to knitting with me. You should go see her lovely shop ... wish her happy birthday aswell ... its today!


Also this cute beyond cuteness; Ha - Pea - Christmas decoration my friend Nicki gave me so I would promise not to open her gift before the big day!


Also my oldest and dearest friend Charlotte included a crocheted star in her card, which I hung with love and lots of memories! I can't wait to see her over Christmas! She has just got engaged and we have soooo much to talk about!


So as you can see I have been busy deckin' the halls. I loved dressing the tree as always. I love getting out all my decorations I have collected over the year. Each year my mum got me, my sister and her, a decoration each in our stockings. And now I have moved out I have lots of Christmas memories each year to hang out on my own tree. I love the fact my tree has a mismatch of ornaments. No two are the same and I love standing by it looking at them deciding which one is my favourite today!

Here are the two which I admired most last night...

I brought this one for Craig last year which if you look closely is a vintage picture of a boy and girl looking at a deer. It reminds me so much of the fun we have watching deer on Cannock Chase.

 
The red egg you can see hanging is a Polish Egg which Craig hangs up every year in memory of his Grandad. The photo really doesn't do it justice. It is a pretty, glittery thing of beauty.


So that's all for now. As I am off this week I would love to be a bit more of a blogger. So hopefully will catch up with you more over the week.

Have a merry lead up to Christmas, and remember its not too late to be good!

Kate xxxxxxx

Thursday, 13 December 2012

Felted mouse and bag


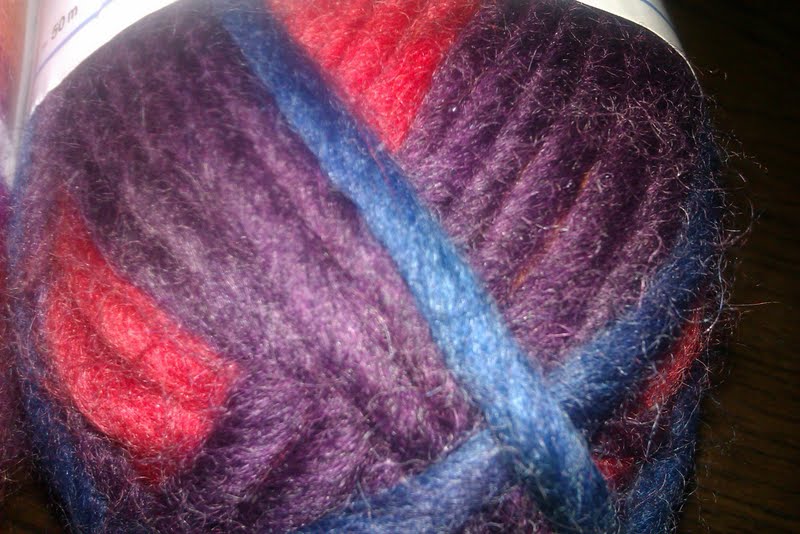
I have been having a ball. A ball with 100% wool.

My two little cousins are coming to spend Christmas with us and I was dying to use the felting wool I brought a couple of months ago and this was the perfect excuse. Two home made gifts!

Firstly I'll just allow you a couple of seconds to Oooooooooo, Mmmmmmmmm over the colours!


 The little bag was made using a fandabbydosey pattern here (if you haven't checked this site out you are in for a flippin treat!) I used the mobile pouch pattern and then have added a strap. Its idea for a little girls over the body bag.


Look at the sherberttie colours. I loved knitting with this yarn!!!!


Hanging on the tree ... and why not! Its Christmas!


Then there is this cheeky little fella.


I hope Ben likes him. I certainly do.


I used the pattern from my tutorial for a little knitted mouse. You can see it here.


This was my first attempt at felting. I am certainly very pleased and would recommend you have a go too. xxxxxxxxxxxxxxxxxxxx